How to Ice Cakes: 5 Easy Decorating Tips for Beginners
Hayley
Girl, there’s something absolutely magical about transforming a plain cake into a stunning centerpiece! Whether you’re celebrating a birthday, hosting friends, or just treating yourself to something special, knowing how to ice cakes properly can turn your homemade creation from “okay” to “oh my gosh, did you really make this?!”Don’t worry if you’ve never held a piping bag before or if your previous frosting attempts looked more like abstract art (we’ve all been there!). Today, I’m sharing 5 foolproof ways to ice a cake that’ll have you decorating like a pro in no time.
Before We Start: The Secret to Perfect Cake Icing
Here’s the thing about cake decorating – it’s not about being perfect; it’s about having fun and creating something that makes people smile. But there are a few game-changing tips that’ll make your life so much easier:Essential prep tips
Always let your cake cool completely before frosting (I know, patience is hard!)
Keep your frosting at room temperature for easy spreading
Have all your tools ready: offset spatula, piping bags, and plenty of napkins
Don’t stress about perfection – “rustic” is totally in style!
Method 1: Classic Buttercream Smoothing
This is your go-to method for that bakery-smooth finish that looks absolutely professional!What you’ll need:
Buttercream frosting (store-bought works perfectly!)
Offset spatula or large butter knife
Bench scraper (or a clean ruler)
How to frost a cake step-by-step:
Start with a generous dollop of frosting on top
Spread it evenly, letting some hang over the edges
Work your way down the sides, adding more frosting as needed
Hold your bench scraper at a 45-degree angle and slowly turn the cake
Clean up the top edge with your spatula
Pro tip: This method is perfect for beginners because even if it’s not perfectly smooth, it still looks elegant and homemade in the best way!
Method 2: Textured Frosting Fun (Easy Cake Decoration That Hides Mistakes)
Sometimes the best cake decorating ideas are the ones that embrace imperfection! Textured frosting is forgiving and adds so much character to your cake.Popular texture techniques:
Swirl pattern: Use a spoon to create gentle swirls all over
Rosette design: Use a star tip to pipe small roses covering the cake
Rustic waves: Drag your spatula through the frosting in wavy motions
Stippled effect: Gently press a clean sponge into the frosting
Perfect for casual celebrations and family gatherings
Method 3: Ice a Cake with Fondant
Okay, I know fondant can seem intimidating, but hear me out – it’s actually one of the most forgiving ways to get that flawless finish!How to ice a cake with fondant:
Roll your fondant to about ¼ inch thickness
Gently drape it over your cake (buttercream underneath helps it stick)
Smooth from the center outward, eliminating air bubbles
Trim excess, leaving about 2 inches to tuck under
Use a fondant smoother for that perfect finish
Types of fondant icing:
Ready-made fondant: Perfect for beginners, available in multiple colors
Homemade marshmallow fondant: Softer texture, easier to work with
Chocolate fondant: For when you want that extra indulgence
Best part: Fondant gives you a blank canvas for any decorating ideas your heart desires!
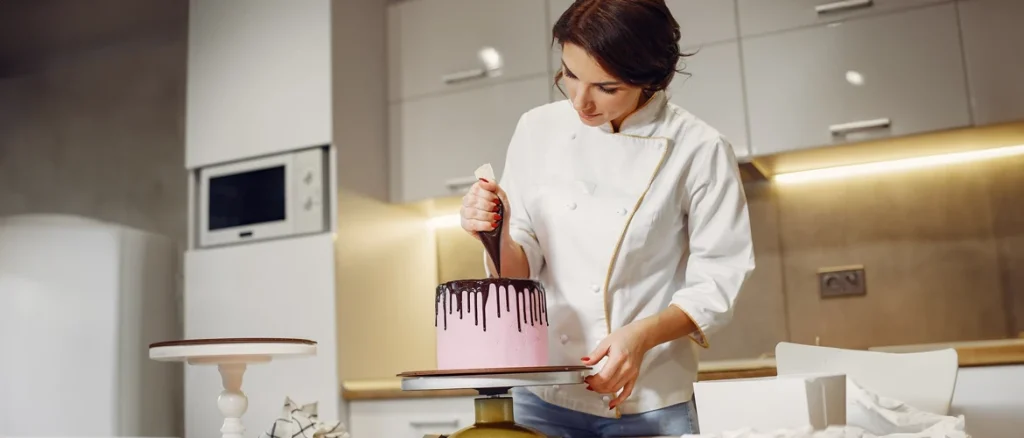
Start with small drops around the edge of your cake
Let gravity do the work – some drips should be longer than others
Fill in the top with more ganache if desired
Add toppings while the drip is still wet (sprinkles, berries, brownies, cookies!)
Pro tip: Practice the drip technique on a plate first to get the consistency just right!
Method 5: Naked Cake Style
Sometimes less is more, and naked cakes prove that beautifully! This style is perfect when you want something elegant but approachable.How to achieve the naked cake look:
Apply a thin layer of frosting between layers
Use minimal frosting on the outside – you should see the cake through it
Focus on beautiful toppings: fresh flowers, berries, or herbs
Embrace the rustic, homemade appearance
Why naked cakes are perfect for beginners:
Mistakes look intentional
Uses less frosting (budget-friendly!)
Showcases your beautiful cake layers
Perfect for any occasion from casual to elegant
Different Types of Cake Icing
Confused about all the different types of icing? Let me break it down for you in simple terms:
What it is: Cream cheese + butter + powdered sugar
Best for: Carrot cake, red velvet, spice cakes
Flavor: Tangy-sweet, perfectly balanced
Whipped Cream (The Light Option)
What it is: Heavy cream whipped with sugar
Best for: Light cakes, summer desserts
Flavor: Light, airy, not too sweet
Ganache (The Chocolate Lover’s Dream)
What it is: Chocolate + heavy cream
Best for: Chocolate cakes, drip effects
Flavor: Rich, decadent, pure chocolate bliss
Royal Icing (The Detail Master)
What it is: Egg whites + powdered sugar
Best for: Detailed decorations, cookies
Flavor: Very sweet, hardens completely
How to Ice a Cake Without Crumbs
Nothing ruins a beautiful cake like crumbs mixed into your pristine white frosting! Here’s how to avoid this rookie mistake:The crumb coat method:
Apply a very thin layer of frosting all over your cake
Refrigerate for 30 minutes
Apply your final, thick layer of frosting
The first layer “seals in” all the crumbs!
Other crumb-preventing tips:
Use a clean spatula for each application
Don’t press too hard when spreading
Keep your cake well-chilled before final frosting
Can You Ice a Cake When It Is Frozen?
Not directly, but you can work with frozen cakes!Here’s what works:
Thaw completely before final decorating
You can apply a crumb coat to a frozen cake, then thaw
Frozen cakes are actually easier to handle and less likely to break
What doesn’t work:
Frosting won’t spread properly on frozen surfaces
Condensation will form as it thaws, making frosting watery
Easy Cake Decoration Ideas for Every Skill Level
Beginner-Friendly
Fresh berries arranged on top
Dusting with powdered sugar
Simple piped borders
Chocolate shavings or sprinkles
Intermediate Options
Piped rosettes or stars
Two-tone frosting effects
Simple fondant decorations
Drip cake techniques
Advanced (But Still Doable!)
Buttercream flowers
Multi-layer naked cakes
Detailed piping work
Fondant figures
How to Ice a Cake with Icing Sugar (Quick & Simple)
Sometimes you just need something quick and sweet! Here’s how to make a simple icing with just powdered sugar:Basic powdered sugar icing:
2 cups powdered sugar
3-4 tablespoons milk or water
1 teaspoon vanilla extract
Mix until smooth and drizzle over your cake. It’s perfect for pound cakes, bundt cakes, or when you want something light and not too sweet!
Frequently Asked Questions
What’s the difference between icing and frosting?
Technically, frosting is thicker and fluffier (like buttercream), while icing is thinner and sets harder (like royal icing). But honestly? Most people use the terms interchangeably, and that’s totally fine!
How far in advance can I ice a cake?
Buttercream and cream cheese frosting: 2-3 days in the fridge. Fondant: up to a week at room temperature. Always bring refrigerated cakes to room temperature before serving for the best taste!
What if my frosting is too thin?
Add more powdered sugar, one cup at a time, until you reach the right consistency. If it’s too thick, add liquid (milk, cream, or water) one tablespoon at a time.
Can I fix a cake that’s already been frosted?
Absolutely! If you’re not happy with how it looks, you can always scrape off the frosting and start over. Or embrace the imperfections and call it “rustic chic” – it’s all about confidence!
What tools do I really need for cake decorating?
Start simple: offset spatula, piping bags, a few basic tips (round and star), and a bench scraper. You can create amazing cakes with just these basics!Remember, the most important ingredient in any cake is the love you put into it. Whether your frosting is Pinterest-perfect or charmingly homemade, what matters is that you tried, you learned, and hopefully, you had some fun along the way!Don’t be afraid to experiment, make mistakes, and try again. Every professional baker started exactly where you are right now – with a cake, some frosting, and the desire to create something beautiful.Your homework: Pick one of these methods and try it this weekend! Start simple, be patient with yourself, and remember – even if it doesn’t turn out exactly as planned, I bet it’ll still taste absolutely delicious.